![Destroy The Monoliths [alpha v0.6]](https://img.itch.zone/aW1nLzEyMzE5MTA2LnBuZw==/original/jdH%2BV5.png)
Destroy The Monoliths [alpha v0.6]
DevLog #9 – How to optimize your game made with Godot (2/2)
Hello everyone!
Here comes part 2 of my devlog series on optimization.
If you didn’t read part 1, start here!
Part 2 – My experience with Destroy The Monoliths
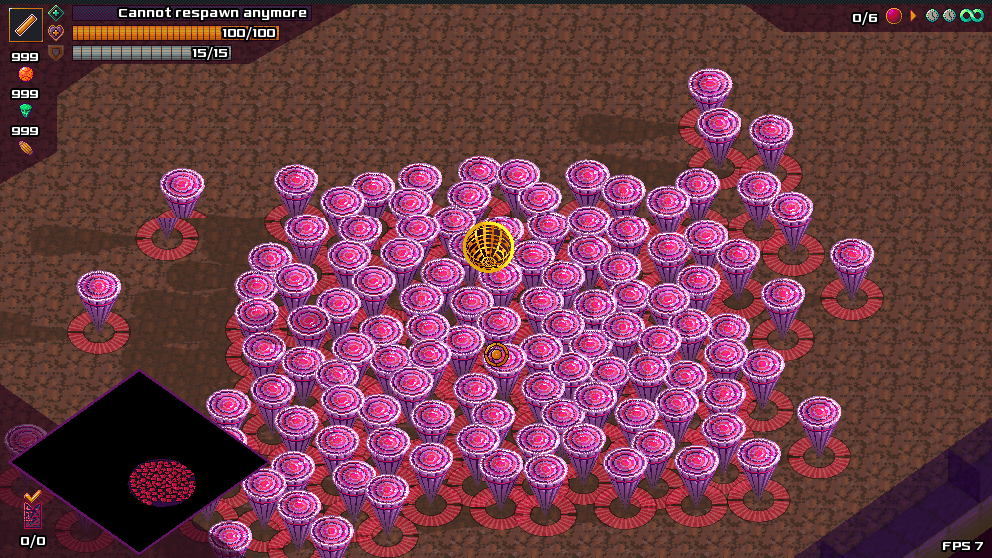
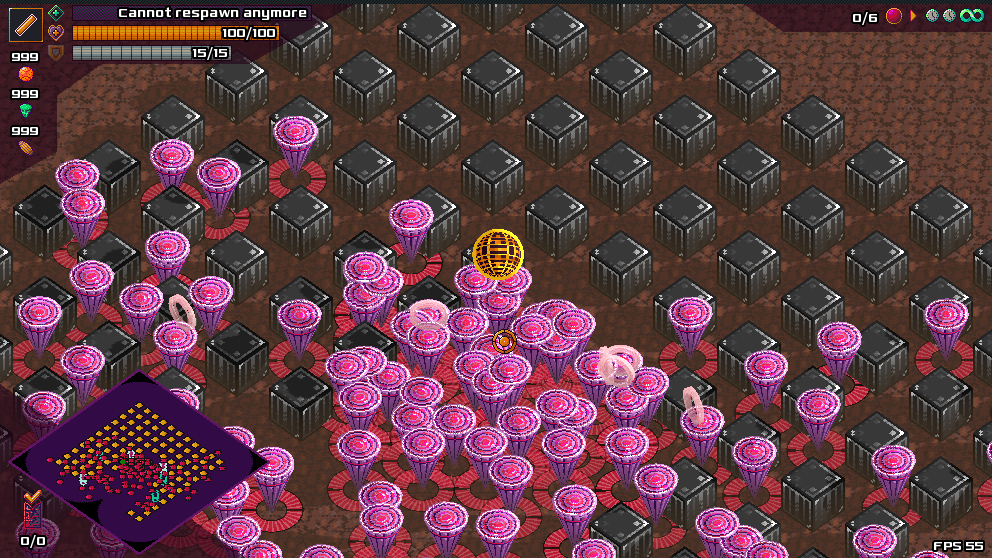
Let’s talk today about some concrete solutions I used to optimize Destroy The Monoliths. First, let’s recap that this is a real-time strategy tower offensive roguelike. You explore a randomly generated map, mine the terrain to get resources, and build turrets to both defend your base and fight corrupted monoliths that keep spawning minions.

Instantiation lag spikes
Reduce the number of nodes
One issue I noticed in my project is that spawning a dozen of enemies at once can trigger a lag spike. Enemies were indeed a complex scene with many nodes, so the instantiation was quite expensive. To make the process faster, the solution consists in reducing the number of nodes. There are several ways to do that:
- Use the servers.
PhysicsServerandVisualServerallow to control collision shapes and to render meshes and particles solely from code. So you don’t need nodes in the tree anymore. It requires some setup and makes the script a bit less readable, but it can help a lot with performances.

- Use tweens.
SceneTreeTweenis a powerful and lightweight object. Most timers and simple animations can be emulated with them so maybe you don’t need nodes. - Lazy load. I created an ice mesh that I display when an enemy gets frozen. However, this only happens if the player uses the ice gun or built ice turrets. It is likely that most enemies will never get frozen, so getting the mesh ready for all of them seems like a waste. For status effects, I decided to opt for a lazy approach. If an effect triggers and requires to display some mesh or particles, the script will check if the enemy already has the relevant nodes, and if not will instantiate them. That means there is some node instantiation on the fly, but in my situation it turned out to cause less lag than having everything ready for everyone.
Reuse resources
Creating new meshes, materials, shapes, etc, can be expensive. The more you can reuse them, the better. I think this is especially true when using the servers because we do everything in code so we can end up doing very inefficient things if we are not careful enough. This is definitely something I experienced. For example, to setup the physics query of my bullets, I had writen:
var shape: Shape
func _ready() -> void:
shape = SphereShape.new()
shape.radius = 0.5
query = PhysicsShapeQueryParameters.new()
query.set_shape(shape)<br>
Each bullet needs it own query because it needs to check the collisions with its own transform. But it doesn’t need to have its own shape: all bullets could share the very same spherical shape resource. So we can do things smarter. Let’s create instead a SphereShape resource and save it in the project. Then, I simply need to preload it:
const SHAPE = preload("res:/bullet_sphere_shape.tres")
func _ready() -> void:
query = PhysicsShapeQueryParameters.new()
query.set_shape(SHAPE)
his runs much faster. Creating resources with code can actually be expensive. Even if you need a specific unique instance, it could be better to create a template resource in the project, preload it and simply duplicate it before customizing some things. You don’t need to set all the parameters and rebuild it from scratch every time.
Pooling
If all of the above is not enough, there is one more another powerful solution available: pooling. I actually do not use it in Destroy The Monoliths but I did in Skycliffs for the bullets so I want to mention it anyway. You create a large pool of objects at the launch of the game and pick in the pool whenever you need. Instead of freeing the object, you then remove it from the tree, call some reset function and push it back into the pool to reuse it later. This can be very efficient.
However, this means you have to write a custom reset function so it can be a bit cumbersome. When adding new modifiers to my bullet, I often forgot to add the corresponding reset so this was a recurrent source of bugs… Also, if your reset function is as expensive as directly instantiating the node, you loose all the benefit of pooling.
Rendering
Beware of shadows and transparent objects
Transparent objects are handled differently by the engine so the Godot documentation recommends to use them with care. In my project, I use transparent cylinders to show the range of effect of buildings. The meshes can get quite big for towers with a long range and I noticed a FPS drop each time one of them was visible. The trick I found was to make the material unshaded. It got the FPS back up and this small visual change doesn’t bother me at all.
Another possibility is also to disable the depth testing so that the mesh gets always visible. Then, the engine does not have to draw it in the right order to blend it with the background so this is cheaper. I use this for shockwave particles for instance. I feel it doesn’t bother if they are visible no matter the depth.
Besides, I noticed that particles nodes could hamper the FPS even when they are not emitting. So a good practice could be to hide and show them only when relevant. Instead of messing with the visibility, disabling the shadows on these nodes also works if that’s something you are willing to do. I use this trick for bullet impact particles, I don’t need dynamic shadows there.
Add custom settings
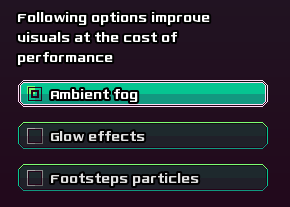
A standard way to deal with performances is to provide players with a bunch of options. Depending on their hardware, they can boost the graphics or not. I added a few options in Destroy The Monoliths, mainly for post-processing effects like the ambient fog and the glow effects. I think this is a good practice because optimization has its limits. Some visual effects are inherently expensive to render and you don’t want to give up on them because they fit your creative vision for the game. Options are a good way to allow players with less powerful hardware to still enjoy the gameplay.
Adapt the quality settings to the art direction
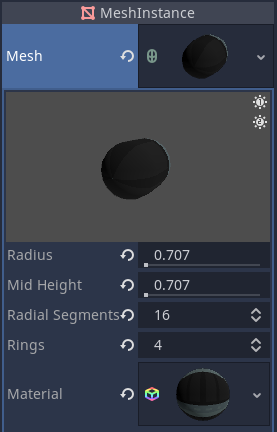
Destroy The Monoliths has a 3D pixel art look with a fixed resolution. A plane of size 1×1 in game displays a 16×16 pixels texture. I also use dynamic lightning and normal mapping, but no high resolution textures. So I can afford to significantly reduce the number of segments and rings on meshes. It renders faster while the difference in quality is almost invisible.
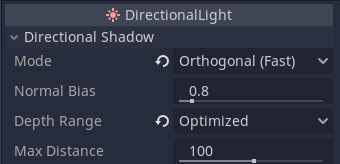
The same principle applies to the shadows. Since every bit of terrain is destructible in Destroy The Monoliths, I cannot use baked shadows and have to use dynamic shadows. But I can lower the quality settings of the shadows, both in the project settings (rendering/quality/directional_shadow/size) and in the DirectionalLight node parameters. Again, it is almost impossible to see the difference visually but the FPS gets a lot better.
Physics
Apply gravity only if relevant
In Skycliffs, I had to apply a gravity force to all kinematic bodies at all time because verticality was a huge feature of the game. Entities could jump, fall off cliffs, fall into the void, get pushed away, etc. This means entities collide very often with the floor and this is expensive.
In Destroy The Monoliths, verticality is not part of the gameplay. The enemies fall off when spawned by a monolith and then never change altitude again. All knockback forces remain in the XZ plane. The same is true for the player, and the whole map is flat. So, when entities reach the minimum possible altitude, I stop to apply the gravity because I know it won’t matter. So entities actually never collide with the floor and this saves a lot of computation for the physics engine. With this simple trick, I was able to get a lot more of enemies on the map at the same time with a better FPS.
Handle collisions differently
Collisions between enemies is also a huge performance bottleneck in Destroy The Monoliths. The goal of enabling collision is to avoid enemies overlapping each other. I ended up going for a trade-off on this aspect. For the sake of performance, I disabled collision between enemies. So they can theoretically overlap. But I added some additional code to control their movement and make it not that likely to happen.
In Destroy The Monoliths, I use A* pathfinding (very similarly to what I did for Skycliffs here) for enemies to move towards a target. When enemies want to go in one direction, I run two raycast to detect if there is another fellow enemy right ahead or currently overlapping. If yes ahead, the enemy stops. If yes overlapping, the enemy still moves but rotates the direction a bit on a random side. (NB: it does that only if it has a higher identifier than its fellow because the problem would persist if both try to break the overlap by going in the same direction…).
Enemies still overlap from time to time, but not that often and usually not for long. So I’m pretty happy with this little control code. Two raycast are way cheaper than having the physics engine deal with a lot of collisions. Likewise to pathfinding computation, I do not run this check at each frame, but rather a few times per second. This helped to get the FPS at a decent value with 120+ enemies on the map.
Closing words
These were the main tricks I used to optimize my game Destroy The Monoliths made with Godot. I hope you enjoyed this mini series on optimization and found it useful in some way. Let me know in the comments if you have some optimization tips that you like a lot and want to share!
Thanks for reading, and see you next time for another devlog!
Leave a comment
Log in with itch.io to leave a comment.